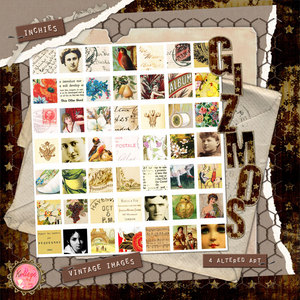
I used this product from Kollage by Kay in our digi shop:
I'll make a paper stamp first.
First thing you want to do is open your sheet of 1 inch images and print out the whole sheet.

Now cut out the images you want to use and edge them with stamp edger scissors. (I didn't have scissors the right size so I went old school and used an eyelet punch, hammer and all.)

Now just adhere your stamps to your project.

Now for the digital stamp.
Open the image sheet and use your rectangular marquee tool to copy and paste the image you want to a new canvas.

You may want to make your background black so that you can see your stamped edge easier.
Now go to WINDOW>BRUSHES and you should see a new window open. Click on your eraser tool and choose a round brush set at about 19.
Click on BRUSH TIP SHAPE and you should see a slide bar that says SPACING. Check the box and slide the bar to 160%.
You should see the dots of the brush spread apart.

Now using your guide lines simply erase down each side of the image.

When you are done it should look like this and you can drag and drop it to your canvas.

This is exactly what I did to make the stamps on this page:

See, whether you are paper or digi you can make you own stamp just like that!