5 Details To Make Your Pages And Cards POP!- DIRECTIONS

Moderators: ACOT Employee, Crop Hostesses 2015

User avatar
Sara Scraps
Cherry Bing
Posts: 2825
Gallery: 1384
Location: Western Pennsylvania

5 Details To Make Your Pages And Cards POP!- DIRECTIONS

Post by Sara Scraps »

Step #1- #3
Hello and welcome to my 5 Details to Make Your Pages and Cards POP!

DISCLAIMER- I am sure that some of these things will not be new to everyone but hopefully everyone can take something away from my class....

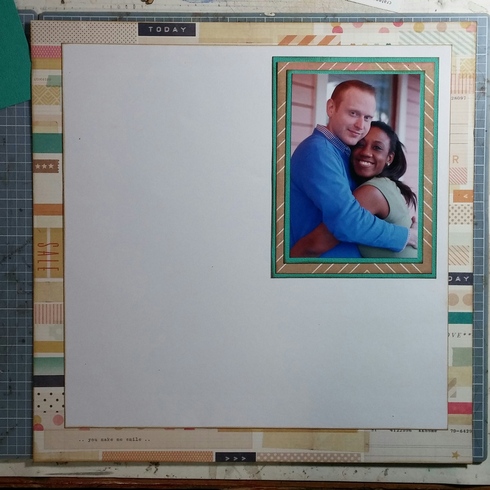
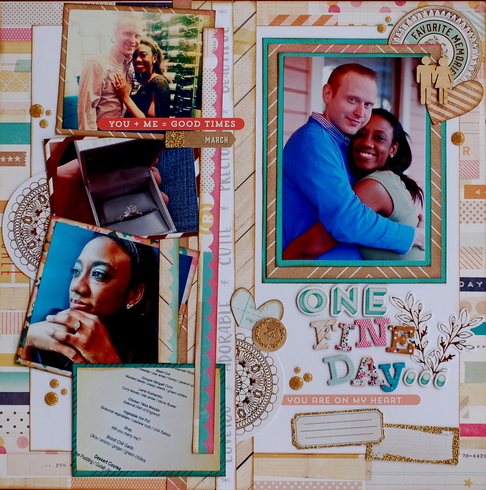
Start by choosing a busy paper to be your background paper. I chose Thrifty from Crate's Craft Market line. Cut a square out of the middle of the page and set it aside for layering later on..
Image
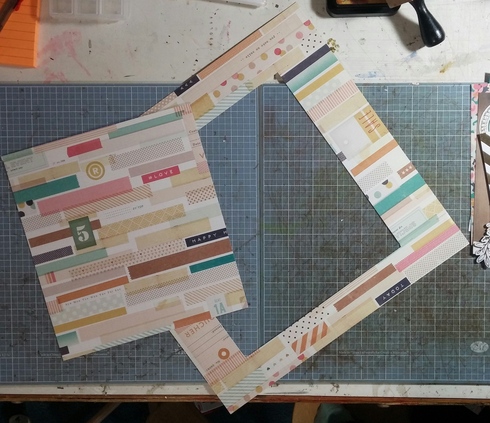
The square I cut is somewhere around 8X8- I definitely did not measure...just guessed and cut.

Choose a solid or small printed paper (I chose white) Cut it to 10 ½ inches X 101/2 inches...you'll need to measure this one...

And here is my first detail to share
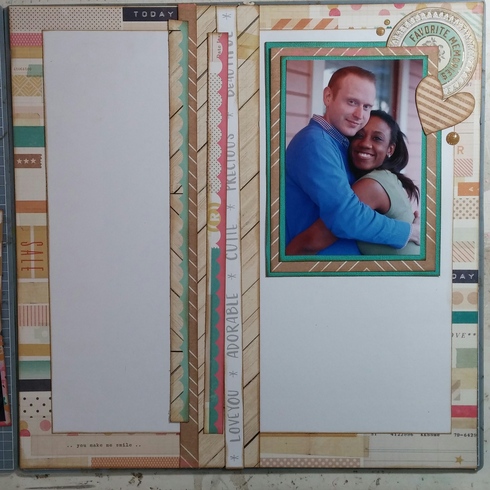
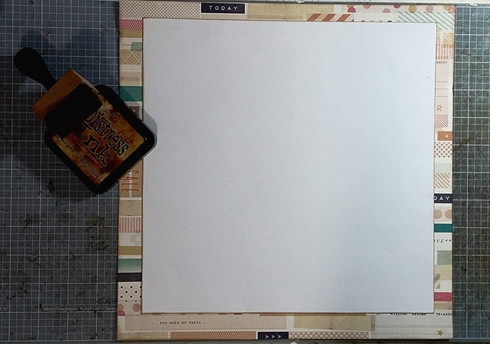
DETAIL #1- INK EVERY LAYER,EVERY TIME. Find an ink you like (I used Tim Holtz Vintage Photo- but there are tons to choose from. Another great one is ColorBox Chestnut Roan Chalk Ink) and use it on every layer of paper on your layout. Even if you aren't going for a “distress” look. In my opinion, ink provides some continuity between layers and some shadows, so the layers will flow together well.
So ink up both of your papers and layer them together..like this..
Alternative- If you don't have ink, mat all your layers very thinly with a white, kraft, or black cardstock.
Image

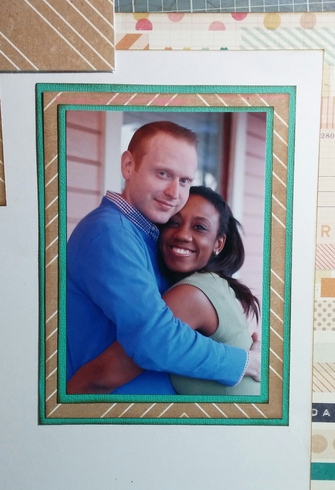
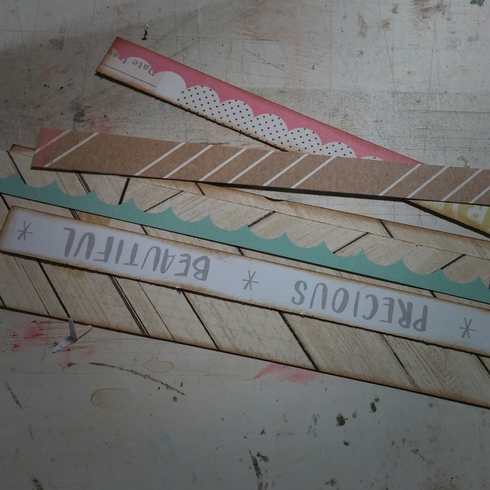
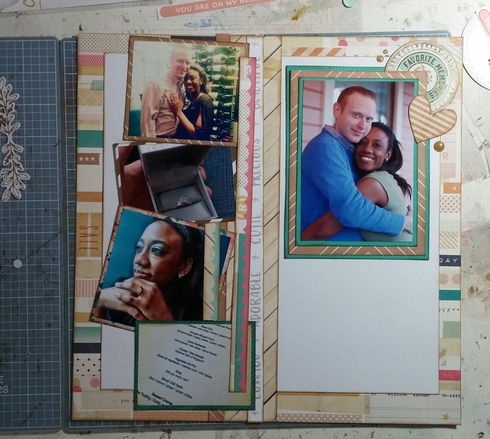
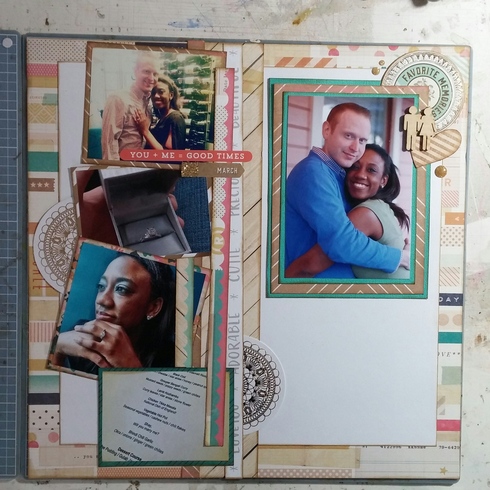
Look at your photos. Choose one to be the “focal” photo and set it aside- we will work on it for the next step. Crop the rest of your photos and mat them with a paper of your choice, inking your edges as you go. (You can skip the ink here if you don't have any) How you crop your photos depends on how many you have- crop them so they will fit down one side of your page- similar to a border. They can be smaller then that but not larger...any questions, ask in the Class Chat thread.
Image
User avatar
emmapaige
Chatty Cherry
Posts: 24761
Gallery: 2439
Location: Eagleville PA

Re: 5 Details To Make Your Pages And Cards POP!- DIRECTIONS

Post by emmapaige »

Awesome instructions Sara.  I may need to chose different photos that I originally picked since they are all  close-ups of my granddaughter Emma and if I crop them I'll be cutting off her head or her body! 
** Chris **

My blog: http://mommomandpoppop.blogspot.com/

 ImageImageImage Image
 
User avatar
average_kim
Cherry Cropper
Posts: 10380
Gallery: 846

Re: 5 Details To Make Your Pages And Cards POP!- DIRECTIONS

Post by average_kim »

I love your tips so far!  Just wondering, is this a challenge for a completed layout?
Kim

Image Image  
User avatar
Sara Scraps
Cherry Bing
Posts: 2825
Gallery: 1384
Location: Western Pennsylvania

Re: 5 Details To Make Your Pages And Cards POP!- DIRECTIONS

Post by Sara Scraps »

average_kim wrote:I love your tips so far!  Just wondering, is this a challenge for a completed layout?
I'm so glad you like my class so far...Check out the chat thread for the class, this isn't a challenge per se but you can get some points and there will be a gallery.
User avatar
Sara Scraps
Cherry Bing
Posts: 2825
Gallery: 1384
Location: Western Pennsylvania

Re: 5 Details To Make Your Pages And Cards POP!- DIRECTIONS

Post by Sara Scraps »

DETAIL #2-GALLERY MAT A FOCAL PHOTO. Gallery matting is a great way to get layers under a photo and then you can add bits of ephemera and other details between those layers to add more layers..
Step #4- Gallery mat your focal photo- If you have a 4X6 photo here is how to galley mat-
Cut your first mat to 4 1/4 X61/4 If your photo is another shape ,just cut your mat 1/4 inch larger.
I ended up needing to trim my focal photo to 3 1/2 X5- so my first mat was 33/4 X 5 1/4
Your second mat is is one half inch larger then your first- so for a 4X6 photo your next mat would be 4 3/4 X 6 3/4. For my photo, the next mat would be 41/4 X 5 3/4.
For your last mat, measure it 1/4 inch larger then your previous mat...and ultimately your photo should be one inch larger all the way around..So for a 4X6 photo= 5X7 mat. For my photo=4 1/2 X 6 inch mat.
Here is my finished matted photo
Image


I chose to use a patterned paper and cardstock. When you adhere your mats together..ONLY put adhesive in the middle of the photos, leave the edges free.
Go ahead and adhere the photo to your page...again, leaving the edges free and only adhereing down the middle.
Image
Now..I like to embellish as I go..Sooo here is what my layout looks like at this step...I chose some ephemera and some enamel dots, tucking and layering them in the corner of my photo. Feel free to do that too...or wait till the end....

 
User avatar
average_kim
Cherry Cropper
Posts: 10380
Gallery: 846

Re: 5 Details To Make Your Pages And Cards POP!- DIRECTIONS

Post by average_kim »

Sara M. wrote:
average_kim wrote:I love your tips so far!  Just wondering, is this a challenge for a completed layout?
I'm so glad you like my class so far...Check out the chat thread for the class, this isn't a challenge per se but you can get some points and there will be a gallery.
Thank you! My head is almost spinning with NSD goodness, so I didn't want to miss any details!
Kim

Image Image  
User avatar
Sara Scraps
Cherry Bing
Posts: 2825
Gallery: 1384
Location: Western Pennsylvania

Re: 5 Details To Make Your Pages And Cards POP!- DIRECTIONS

Post by Sara Scraps »

Now we need some strips of paper. These can be any width..mine range from 1/4 in. to 1 in. but all should be 12 inches long. Ink them up and collect them together.
Image
DETAIL #3- USE SALVAGE EDGES FROM PAPERS ON YOUR LAYERS! You know the bottom edges off of papers. I always look at them when I cut them off and if they have a pattern on them, I use them next time I am layering.. layers look best, in my opinion when there are big and small , skinny pieces mixed together..and those salvage edges are the best for long, skinny layers...
Create a border of all your strips of paper going down one portion of your page...If at any point in my class you get to a spot and think “but my page looks better like this” then go wit that. I liked my strips going vertical...but they could really go wherever is visually appealing to you.Don't try to make them straight, I liked them when they looked almost thrown down...A quick note..to make the next detail, step easier, try not to adhere your strips heavily..don't use a lot of adhesive, so those strips can be lifted up a bit.
This is what my layout looks like now...
Image
User avatar
blfonty
Cherry Cola
Posts: 7282
Gallery: 986
Location: East Tennessee

Re: 5 Details To Make Your Pages And Cards POP!- DIRECTIONS

Post by blfonty »

Great way to frame and add color around photos with the white background. I like the tilted square photos too. Thanks for the tips!
blfonty a.k.a. Bonnie

 Image  
 
User avatar
Sara Scraps
Cherry Bing
Posts: 2825
Gallery: 1384
Location: Western Pennsylvania

Re: 5 Details To Make Your Pages And Cards POP!- DIRECTIONS

Post by Sara Scraps »

DETAIL #4- TUCKING....this is by no means a real, official term...it is really just my own...
Tucking is what I call it when I have my main layers down loosely and I want to add things between the layers...like stickers, die cuts...or in this case, the rest of my photos.
So go ahead and start "tucking" things in to those strips of paper. For this layout I started by tucking my photos between and around my strips of paper like this...
Image
Once I had my photos in place, I started looking for places that needed some more layers tucked around. I know that I am going to place my title and journalling below my focal photo, so I am going to leave most of the white space alone. I know there are lots of "design rules" for embellishing a layout...and I probably do subconciously follow some of them...but I'm not too stuck on them.. I like to just look around my layout and be deliberate about where I put my embellishments. This is also another reason I cut apart stickers, and pretty much most of my embellishments on a sheet...I like to try them out before I am committed.
So go ahead and find spots on your layout where some stickers or die cuts look good.
Move them around a little...try them out different places.
Here is my layout with my photos and some embellishments "tucked" around.
Image
I even ended up deciding to add one more element to the cluster by my focal photo.
User avatar
Sara Scraps
Cherry Bing
Posts: 2825
Gallery: 1384
Location: Western Pennsylvania

Re: 5 Details To Make Your Pages And Cards POP!- DIRECTIONS

Post by Sara Scraps »

DETAIL #5- The Smaller the Better!
My favorite kind of embellishments are the small ones- enamel dots, sequins, brads. I think the are the perfect finishing touch..they are one of the last things I like to add...
So now go ahead and add your title, journaling, and a couple little finishing touches
If you want a "spray " of sequins just take a few in your hand and literally throw them at your layout and glue them down...
For enamel dots- I do like to follow a design "rule" in that I like to cluster my enamel dots in groups of three and create a "visual triangle" with them...but that's just me...
Here is my completed layout...
Image
This layout kinda took on a life of its own at the end...and I did end up grabbing another set of Thickers and a few more die cuts..I'll put some journaling in the boxes below the photo...but I have enough photos to do another face page too....
I think this layout is full of lovely layers and fun things to look at..and I like it. But as you finish yours, finish it how you like it. If mine looks a bit busy or your have less photos..just improvise. I have always tried to keep my layouts simple and cleaner looking but recently I have really started to layer and fill my layouts with more bits and pieces....And after my layout was all done..I was really regretting putting my wood veneer couple where I did...I wish I had placed them a little lower..you can't even tell there is a heart behind them now....lol
I hope you really enjoyed my class this evening and enjoy the rest of NSD!
User avatar
ang_scraps
Cherry Tart
Posts: 26

Re: 5 Details To Make Your Pages And Cards POP!- DIRECTIONS

Post by ang_scraps »

Great tip on cutting out the center, especially if it's a paper you love and only have one of. Love the tip on the strips of paper, I'm going to have to do this.
User avatar
blbabe1234
Cherry Bark
Posts: 78034
Gallery: 3695
Location: Corpus Christi, TX

Re: 5 Details To Make Your Pages And Cards POP!- DIRECTIONS

Post by blbabe1234 »

WOW! Great class Sara! I've copied/pasted your directions and will be ready to do this tomorrow! Thank you!
Brandy 🐾 🐾 ❤️

  ImageImage   ImageImageImage
User avatar
Sandi0805
Bowl Full of Cherries
Posts: 18284
Gallery: 2310
Location: Central Indiana

Re: 5 Details To Make Your Pages And Cards POP!- DIRECTIONS

Post by Sandi0805 »

Loved your tutorial Sara.  Can't wait to make a layout. 
 Image ImageImage
   Image
User avatar
PezKat
Chocolate Covered Cherry
Posts: 8241
Gallery: 514

Re: 5 Details To Make Your Pages And Cards POP!- DIRECTIONS

Post by PezKat »

This was great!!  Thank you for all the tips and the step-by-step photos.  Definitely a keeper!!

And btw I like where you placed the people & I can still tell it's a heart. :)
Image Image
User avatar
debamas
Wild Cherry
Posts: 15565
Gallery: 228
Location: Milton, FL

Re: 5 Details To Make Your Pages And Cards POP!- DIRECTIONS

Post by debamas »

This is great! I need to hang onto this thread. I have to go to work in the morn but I'm leaving out my NSD stuff until Wed when I'm off again. Thanks for the lesson!
Debbie


User avatar
writerlady
Bowl Full of Cherries
Posts: 20573
Gallery: 448
Location: Southeast Connecticut

Re: 5 Details To Make Your Pages And Cards POP!- DIRECTIONS

Post by writerlady »

Great class! I love your layout - it's beautiful.  I'm bookmarking this.
Please stop by my blog,Writerlady's Craftroom


User avatar
CarrieG
Cherry Jubilee
Posts: 12060
Gallery: 1781
Location: Texas

Re: 5 Details To Make Your Pages And Cards POP!- DIRECTIONS

Post by CarrieG »

thanks for sharing your class!
User avatar
JillinIN
Cherry Cola
Posts: 5501
Gallery: 479
Location: Indiana

Re: 5 Details To Make Your Pages And Cards POP!- DIRECTIONS

Post by JillinIN »

Here's mine. This was so fun and I  learned a lot. I think I'll try it again with smaller pictures and a girly theme.
I cut the three pictures, on the left hand side, down about 4 different times and they were already matted so each time I cut the mats down too.Image
I really love how it turned out. Thank you so much for the wonderful step-by-step instructions and photos.
Image
 
Jill
 Jill
ImageImage
User avatar
hsblair
Cherry Bing
Posts: 2739
Gallery: 596

Re: 5 Details To Make Your Pages And Cards POP!- DIRECTIONS

Post by hsblair »

I was away during this hour, but I saw Jill's layout in the gallery and had to come check out these instructions.  I will have to try this!  Love the tips--especially inking every layer--I love inking!
Image Image Image Image
User avatar
jan509
Cherry Blossom
Posts: 500
Gallery: 908
Location: Pacific NW

Re: 5 Details To Make Your Pages And Cards POP!- DIRECTIONS

Post by jan509 »

Thanks for your class (I went through late). Love your tips and your layout is really cool! I'm going to try out some of your ideas~
Post Reply

Return to “NSD 2015”